
Wir schätzen uns glücklich, in Ecuador Freunde zu haben, die sich intensiv um den Schutz der Natur kümmern. Unsere Freude am Reisen in diese hochbiodiversen Schutzgebiete mit ihrer einmaligen Pflanzen- und Tierwelt ist für uns eine Herzensangelegenheit.
Die Begegnung mit extrem seltenen Arten stellt für uns eine fotografische Herausforderung dar, um einerseits die Schönheit der Natur zu dokumentieren und andererseits diese Erfahrung mit anderen Menschen zu teilen.
Nos consideramos felices de tener amigos en Ecuador que se preocupan intensamente por la protección de la naturaleza. Nuestra alegría al viajar a estas zonas protegidas de gran biodiversidad, con su flora y fauna únicas, es una cuestión de corazón para nosotros.
El encuentro con especies extremadamente raras es un reto fotográfico para nosotros, por un lado para documentar la belleza de la naturaleza y por otro para compartir esta experiencia con otras personas.
We consider ourselves lucky to have friends in Ecuador who care deeply about the protection of nature. Our joy in travelling to these highly biodiverse protected areas with their unique flora and fauna is a matter of the heart for us.
Encountering extremely rare species is a photographic challenge for us, on the one hand to document the beauty of nature and on the other hand to share this experience with other people.
- Wie bereiten wir NaturFoto-Reisen vor? - ¿Cómo preparamos los viajes de NaturFoto? - How do we prepare NaturFoto trips?
Wir konzentrieren uns auf Vögel, die in bestimmten Regionen unter Schutz stehen. Die britische Organisation BirdLife International führt ein Register über alle weltweit vorhandenen Vogelreservate. Das Register benutzen wir, um uns über die Schutzgebiete und den Status geschützter Vögel zu informieren. Jedes Schutzgebiet besitzt in der Regel ein oder mehrere Vogelarten, die als Schlüsselart gelten.
Zur Identifikation von Vogelarten greifen wir auf die Standardwerke zurück:
Aves Del Ecuador (Ridgely et. al.),
Birds of Ecuador (Restall/Freile) und Publikationen der INABIO in Quito.
Als elektronisches Medium nutzen wir die App "Merlin".
Nos concentramos en las aves que están protegidas en ciertas regiones. La organización británica BirdLife International mantiene un registro de todas las reservas de aves existentes en el mundo. Utilizamos el registro para conocer las zonas protegidas y la situación de las aves protegidas. Cada área protegida cuenta normalmente con una o más especies de aves que se consideran especies clave.
Para identificar las especies de aves, nos remitimos a las obras estándar:
Aves del Ecuador (Ridgely et. al.),
Birds of Ecuador (Restall/Freile), y publicaciones del INABIO en Quito.
Como medio electrónico utilizamos la aplicación "Merlin".
We focus on birds that are protected in certain regions. The British organisation BirdLife International keeps a register of all existing bird reserves worldwide. We use the register to inform us about the protected areas and the status of protected birds. Each protected area usually has one or more bird species that are considered keystone species.
To identify bird species, we refer to the standard works:
Aves Del Ecuador (Ridgely et. al.),
Birds of Ecuador (Restall/Freile) and publications of INABIO in Quito.
As an electronic medium we use the app "Merlin".

2. Vögel fotografieren - fotografiar aves - photographing birds
Wir fotografieren schon seit einigen Jahren und sind mit unserer Ausrüstung vertraut. Geübt haben wir zuerst viel im Garten, dann am See und später in den Bergen bei unterschiedlichen Lichtverhältnissen. Übung und Erfahrung sind die entscheidende Voraussetzung für erfolgreiche Vogelfotografie.
Für die Vogelfotografie benutzen wir Kameras vom Typ DSLR (Digital Single Lens Reflex) mit Teleobjektiven bis 500 mm Brennweite. Das Gewicht der DSLR mit dem Tele 200-400/f.4 beträgt fast 5 Kg, das der DSLR mit dem 200-500/f.5.6 etwa 3,5 Kg. Letzteres hängt an einem Spezial-Gurt, das erste an einem Original-Gurt. Das Gewicht ist grenzwertig, wenn man sich damit im Gelände bewegt.
Hinzu kommt ein Spektiv für die Vogelbeobachtung, das jedoch nur stationär zum Einsatz kommt. Ferngläser sind immer dabei.
Die Teleobjektive sind ab Beginn der Reise an die Kameras angesetzt, um für jede Gelegenheit schussbereit zu sein. Zudem sind die Kameras und Objektive tagsüber mit Regenschutz überzogen. Nachts lagern wir die Geräte ohne Regenschutz, damit sich kein Kondens bildet.
Wir benutzen keine Stative, da diese im Gelände stören. Als Ersatz kommen Zaunpfähle, Äste oder ähnliches zum Einsatz. Da sich Vögel schnell bewegen, fotografieren wir im Normalfall freihändig, in der Regel mit eingeschaltetem Bildstabilisator. Wir belichten mit manueller Einstellung, fixierter Blende (5.6 bzw. 6.3), variablem Speed (30 - 1250, ab 400 ohne Stabi) und variabler ISO (100-6400). Wir wollen scharfe Fotos machen und belichten daher so schnell wie möglich, jedoch wollen wir auch farbgetreue Fotos und belichten daher mit niedrigen ISO und längeren Verschlusszeiten.
Wir fotografieren selten mit Einzel-, im Regelfall mit Serien-Auslösungen von 3 Fotos pro Sekunde, da es wegen der Bewegung der Vögel zu unscharfen Fotos kommen kann und wir möglichst ein scharfes Foto erzielen wollen.
Am schwierigsten ist die Vogelfotografie im Regenwald, am frühen Morgen und späten Abend, wenn das schwache Licht zu hohen ISO-Werten zwingt. Harte Schlagschatten in der überstrahlenden Mittagssonne am Äquator sind genauso schwierig, wenn Fotos stark abgeblendet werden müssen. Ein Vogel im Gegenlicht muss fast schon überbelichtet werden. Hier öffenen wir manuell die Blende zusätzlich um einige Lichtwerte.
Llevamos varios años fotografiando y estamos acostumbrados a nuestro equipo. Primero practicamos mucho en el jardín, luego en el lago y más tarde en la montaña en diferentes condiciones de luz. La práctica y la experiencia son la clave del éxito de la fotografía de aves.
Para la fotografía de aves utilizamos cámaras de tipo DSLR (Digital Single Lens Reflex) con teleobjetivos de hasta 500 mm de distancia focal. El peso de la DSLR con el teleobjetivo 200-400/f.4 es de casi 5 kg, el de la DSLR con el 200-500/f.5.6 de unos 3,5 kg. Este último se cuelga de una correa especial, el primero de una correa original. El peso está en el límite si vas al campo con él.
Además, hay un telescopio para la observación de aves, pero sólo se utiliza de forma estacionaria. Los binoculares están siempre conmigo.
Los teleobjetivos se conectan a las cámaras desde el inicio del viaje para estar preparados para fotografiar en cualquier ocasión. Además, las cámaras y los objetivos están cubiertos con protección contra la lluvia durante el día. Por la noche, los guardamos sin protección contra la lluvia para evitar que se forme condensación.
No usamos trípodes porque molestan en el campo. Como sustitutos se utilizan palos de valla, ramas o similares. Como las aves se mueven rápido, normalmente fotografiamos a mano alzada, normalmente con el estabilizador de imagen activado. Exponemos con ajuste manual, apertura fija (5,6 o 6,3), velocidad variable (30 - 1250, desde 400 sin estabilizador) e ISO variable (100-6400). Queremos hacer fotos definidas y, por lo tanto, exponer lo más rápido posible, pero también queremos fotos con colores reales y, por lo tanto, exponer con ISO bajos y velocidades de captura más largas.
Rara vez hacemos fotos con disparos simples, normalmente con disparos en serie de 3 fotos por segundo, porque el movimiento de las aves puede provocar fotos desenfocadas y queremos conseguir una foto definida si es posible.
La fotografía de aves es más difícil en la selva tropical, a primera hora de la mañana y al atardecer, cuando la poca luz obliga a un ISO alto. Las sombras duras en el sol de mediodía en el ecuador son igual de difíciles cuando las fotos deben ser fuertemente reducidas. Un pájaro a contraluz casi tiene que estar sobreexpuesto. Aquí abrimos manualmente el diafragma unos cuantos valores de luz adicionales.
We have been taking photographs for a few years and are familiar with our equipment. We first practised a lot in the garden, then at the lake and later in the mountains in different light conditions. Practice and experience are the crucial prerequisites for successful bird photography.
For bird photography we use DSLR (Digital Single Lens Reflex) type cameras with telephoto lenses up to 500 mm focal length. The weight of the DSLR with the 200-400/f.4 telephoto lens is almost 5 kg, that of the DSLR with the 200-500/f.5.6 about 3.5 kg. The latter hangs on a special strap, the former on an original strap. The weight is borderline if you move around in the field with it.
There is also a spotting scope for birdwatching, but it is only used stationary. Binoculars are always with us.
The telephoto lenses are attached to the cameras from the beginning of the trip so that they are ready to shoot at any opportunity. In addition, the cameras and lenses are covered with rain protection during the day. At night we store them without rain protection to prevent condensation from forming.
We don't use tripods because they get in the way in the field. Fence posts, branches or similar are used as a substitute. As birds move quickly, we normally take photos freehand, usually with the image stabiliser switched on. We expose with manual settings, fixed aperture (5.6 or 6.3), variable speed (30 - 1250, from 400 without stabiliser) and variable ISO (100-6400). We want to take sharp photos and therefore expose as fast as possible, but we also want true colour photos and therefore expose with low ISO and longer shutter speeds.
We seldom shoot with single shutter releases, usually with series releases of 3 photos per second, as blurred photos can occur due to the movement of the birds and we want to achieve a sharp photo if possible.
Bird photography is most difficult in the rainforest, in the early morning and late evening, when the low light forces high ISO values. Hard drop shadows in the over-bright midday sun at the equator are just as difficult when photos have to be heavily stopped down. A backlit bird almost has to be overexposed. Here we manually open the aperture by a few additional light values.
hier drei Beispiele
aquí tres ejemplos
Here are three examples
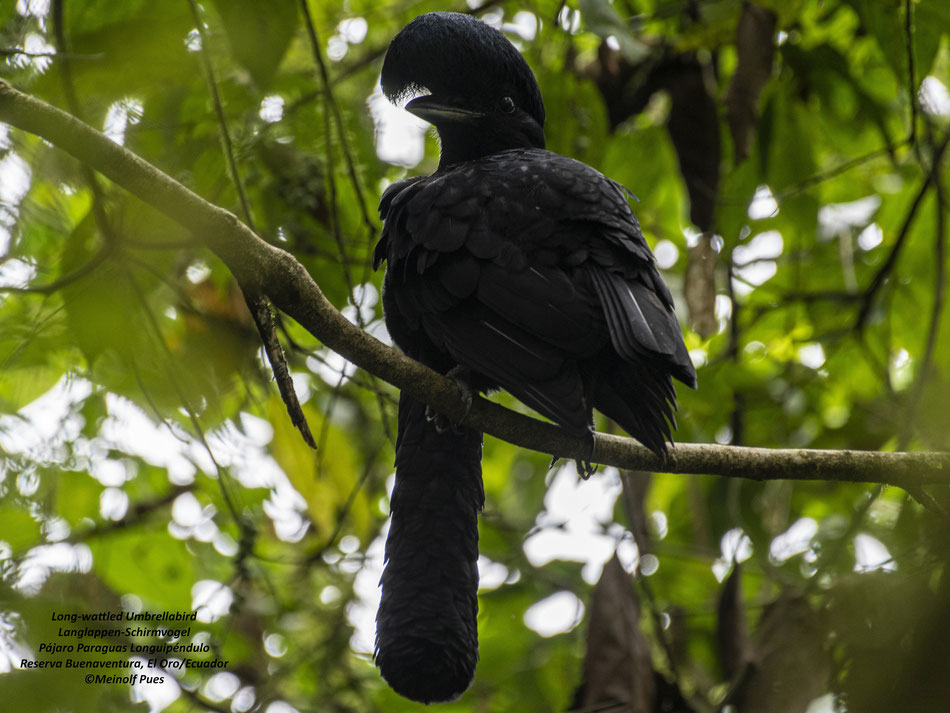
Foto im Regenwald aufgenommen um 4 Uhr nachmittags; Schwierigkeiten: schwarzes Objekt schwer zu fokussieren, schwaches Licht bedingt langsame Verschlusszeit und Gefahr der Verwackelung; Verschlusszeit 1/40 s., f. 6.3, ISO 450, Vibration Reduktion on
Foto tomada en la selva tropical a las 4 de la tarde; dificultades: el objeto negro es difícil de enfocar, la poca luz provoca una velocidad de obturación lenta y el peligro de que la cámara se mueva; velocidad de obturación 1/40 s., f. 6.3, ISO 450, reducción de la vibración activada
Photo taken in the rainforest at 4 p.m.; difficulties: black object difficult to focus, low light causes slow shutter speed and risk of camera shake; shutter speed 1/40 s., f. 6.3, ISO 450, vibration reduction on

Foto am Wasserfall des Rio Pita in der Sonne mittags um 12 Uhr aufgenommen; Schwierigkeiten: Schlagschatten durch hochstehende Sonne, Augen dunkel, harte weisse Flächen im Fell; Verschlusszeit 1/1.600 s., f. 5.6, ISO 500 VR off
Foto tomada en la cascada del Río Pita bajo el sol del mediodía; dificultades: Sombras proyectadas debido al sol alto, ojos oscuros, zonas blancas duras en el pelo; velocidad de obturación 1/1.600 s., f. 5.6, ISO 500 VR desactivado
Photo taken at the Rio Pita waterfall in the sun at noon; difficulties: Cast shadows due to high sun, eyes dark, hard white areas in fur; shutter speed 1/1,600 s., f. 5.6, ISO 500 VR off

Foto im Trockenwald von Arenillas aufgenommen um 2 Uhr nachmittags gegen das Licht; Schwierigkeiten: Gefahr der Unterbelichtung des Vogels bei automatischer Belichtung, Aufhellung des Vogels durch Überbelichtung; Verschlusszeit 1/320 s., f. 6.3, ISO 100, VR on
Foto en el bosque seco de Arenillas tomada a las 2 de la tarde a contraluz; dificultades: Riesgo de subexponer el pájaro con la exposición automática, aclarando el pájaro con la sobreexposición; velocidad de obturación 1/320 s., f. 6.3, ISO 100, VR activado
Photo in the dry forest of Arenillas taken at 2 p.m. against the light; difficulties: Risk of underexposure of the bird with automatic exposure, brightening of the bird by overexposure; shutter speed 1/320 s., f. 6.3, ISO 100, VR on

Vögel sind wegen ihrer Fluchtdistanz häufig weit weg, so dass wir oft nur auf den Körper fokussieren können, um ein scharfes Bild zu erhalten. Dennoch setzen wir den Fokus möglichst immer zuerst auf das Auge des Vogels, damit das Motiv mit uns kommuniziert. Wir arbeiten mit AF-C, also kontinuerlichem Autofokus, um den Autofokus bei Vorwärts- und Rückwartsbewegungen des Vogels mitgehen zu lassen. Vögel hinter Zweigen, Ästen oder Blättern werden oft unscharf, so dass wir in so einem Fall auf das Foto verzichten und daher manchen Vogel nur in der Erinnerung haben.
Las aves se encuentran a frecuencia lejos debido a su distancia de huida, por lo que a menudo sólo podemos enfocar el cuerpo para obtener una imagen definida. Sin embargo, siempre enfocamos primero el ojo de pájaro, si es posible, para que el sujeto se comunique con nosotros. Trabajamos con el AF-C, o autofoco continuo, para que el autofoco siga el movimiento del pájaro hacia delante y hacia atrás. Los pájaros que se encuentran detrás de las ramitas, las ramas o las hojas a menudo se desenfocan, por lo que en tal caso renunciamos a la foto y por lo tanto tenemos algún pájaro sólo en la memoria.
Birds are often far away because of their flight distance, so we can often only focus on the body to get a sharp image. Nevertheless, we always focus on the bird's eye first, if possible, so that the subject communicates with us. We work with AF-C, i.e. continuous autofocus, to let the autofocus follow the bird's forward and backward movements. Birds behind twigs, branches or leaves often become blurred, so in such a case we do without the photo and therefore have some bird only in our memory.
3. Nachbearbeitung - Posprocesamiento - Post-processing
Wir bringen von einer 10-tägigen NaturFoto-Reise durchaus bis zu 5.000 Fotos mit. Alle Fotos nehmen wir im RAW-Format auf, um anschließend den größtmöglichen Spielraum für die Fotoentwicklung zu haben.
Die Nachbearbeitung der Fotos beginnt bereits während der Reise mit der allabendlichen Datensicherung unserer Speicherkarten auf zwei verschiedene Festplatten. Bei 5.000 Fotos kommen schnell über 100 Gigabytes an Datenmenge pro Festplatte zusammen.
Zu Hause am PC ordnen wir die Fotos und fassen sie in thematischen oder chronologischen Ordnern zusammen. Anschliessend sichten wir die Fotos danach, ob sie scharf sind, korrekt belichtet wurden und keine Duplikate darstellen. Nur diese Fotos behalten wir, die restlichen löschen wir.
Und dann beginnt die Entwicklung:
Schritt 1: kritische Prüfung des Bildaufbaus, Motivs und der Belichtung; Schritt 2: Zuschnitt; Schritt 3: Bildkorrektur und Speicherung im Format jpeg.
Podemos llevarnos hasta 5.000 fotos de un viaje fotográfico en la naturaleza de 10 días. Tomamos todas las fotos en formato RAW para tener el mayor potencial posible para el desarrollo fotográfico posterior.
El posprocesamiento de las fotos comienza ya durante el viaje con la copia de seguridad de los datos de nuestras tarjetas de memoria en dos unidades de memoria diferentes cada noche. Con 5.000 fotos, acumulamos rápidamente más de 100 gigabytes de datos por unidad de memoria
En casa, en el PC, ordenamos las fotos y las resumimos en carpetas temáticas o cronológicas. A continuación, comprobamos las fotos para asegurarnos de que son definidas, están correctamente expuestas y no son duplicadas. Sólo conservamos estas fotos, el resto las borramos.
Y entonces comienza la elaboracion:
Paso 1: examen crítico de la composición de la imagen, el tema y la exposición; Paso 2: recorte; Paso 3: corrección de la imagen y guardado en formato jpeg.
We can bring up to 5,000 photos with us from a 10-day NaturFoto trip. We take all the photos in RAW format in order to have the greatest possible scope for photo development.
The post-processing of the photos already starts during the trip with the data backup of our memory cards on two different hard drives every evening. With 5,000 photos, we quickly accumulate more than 100 gigabytes of data per hard drive.
At home on the PC, we organise the photos and put them into thematic or chronological folders. Then we check the photos to make sure they are sharp, correctly exposed and not duplicates. We only keep these photos, the rest we delete.
And then the development begins:
Step 1: critical examination of the image composition, motif and exposure; Step 2: cropping; Step 3: image correction and saving in jpeg format.

Schritt 1:
Original im RAW-Format; Kritik: Vogel zu hoch im oberen Bildausschnitt, Farbdynamik zu schwach
Paso 1:
Original en formato RAW; Crítica: pájaro demasiado alto en la parte superior de la imagen, dinámica del color demasiado débil
Step 1:
Original in RAW format; criticism: bird too high in the upper part of the picture, colour dynamics too weak

Schritt 2:
Bild beschneiden
Paso 2:
Recortar la imagen
Step 2:
Crop image

Schritt 3:
Farbdynamik verstärken, anschließend im Format jpeg. speichern
Paso 3:
Mejore la dinámica del color y luego guarde en formato jpeg.
Step 3:
Enhance colour dynamics, then save in jpeg. format.
4. Präsentation der Fotos - Presentación de las fotos - Presentation of the photos
Jede Reise hat seine eigenen Schwerpunkte. Prinzipiell stellen die besuchten Orte, Regionen und Länder eine eigene Kategorie dar, wie zum Beispiel der Chocó-Regenwald im Nordwesten Ecuadors, der Paramó in den Höhen des Cerro de Arcos im Süden Ecuadors oder die Seenlandschaft im 4.000 Meter hoch gelegenen Nationalpark Cajas westlich von Cuenca . Die Präsentation unserer Fotos orientiert sich zum einem am Reiseverlauf und andererseits an der Einmaligkeit der Erlebnisse der Reise.
Als Resultat entstehen
- Fotobücher
- Reisebeschreibungen als Blog im Internet und
- Diashows
Cada viaje tiene su propio enfoque. En principio, los lugares, regiones y países visitados representan su propia categoría, como la selva del Chocó en el noroeste de Ecuador, el Paramó en las alturas del Cerro de Arcos en el sur de Ecuador o el paisaje lacustre en el Parque Nacional del Cajas de 4.000 metros de altura al oeste de Cuenca. La presentación de nuestras fotos se refiere, por un lado, al itinerario y, por otro, a la singularidad de las experiencias del viaje.
Los resultados pueden ser
- Libros de fotos
- diarios de viaje como blog en internet y
- presentaciones multimedia
Each trip has its own focus. In principle, the places, regions and countries visited represent a category of their own, such as the Chocó rainforest in the northwest of Ecuador, the Paramó in the heights of the Cerro de Arcos in the south of Ecuador or the lake landscape in the 4,000-metre-high Cajas National Park west of Cuenca . The presentation of our photos is oriented on the one hand to the itinerary and on the other hand to the uniqueness of the experiences of the trip.
The results can become
- Photo books
- travel descriptions as blogs on the internet and
- slide shows
Das Fotobuch
El Libro de Fotos
Photo Books
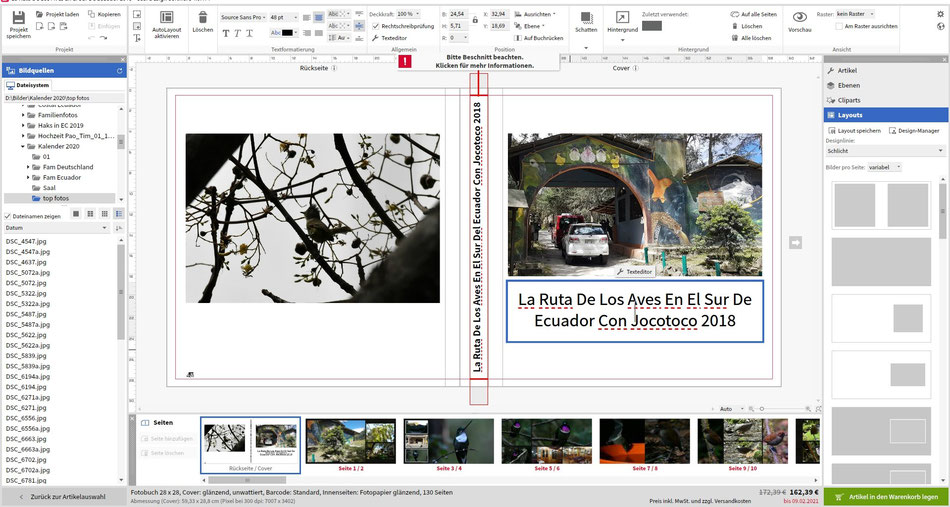

Fotobücher stellen eine vorgegebene Auswahl der besten Fotos für den Betrachter dar, zum Teil mit Bildbeschriftungen. Sie können überall hin mitgenommen, von Hand zu Hand weiter gegeben und zu Anlässen verschenkt werden. Der Betrachter kann beim Durchblättern Fotos nach seinem Belieben betrachten.
Los libros de fotos representan una selección predefinida de las mejores fotos para el espectador, en parte con leyendas. Se pueden llevar a cualquier parte, pasar de mano en mano y regalar en ocasiones. Los espectadores pueden ver las fotos a su conveniencia mientras las hojean.
Photo books present a predefined selection of the best photos for the viewer, sometimes with captions. They can be taken anywhere, passed from hand to hand and given as gifts on occasions. The viewer can look at photos as he or she likes while browsing through them.
Reisebeschreibungen als Blog im Internet
Diarios de viaje como Blog en internet
Travel descriptions as Blogs on the internet

Der Blog im Internet beschreibt Geschichten um die Fotos herum. Der Leser erfährt also mehr als auf dem Foto zu sehen ist. Reiseberichte können auf diese Art Leser intensiver mitnehmen und Teil haben lassen. Der Reisebericht erweitert daher die Perspektive des Fotografen für den Leser.
El blog en Internet describe historias alrededor de las fotos. Así, el lector aprende más de lo que se muestra en la foto. Los diarios de viaje de esta manera pueden hacer que los lectores se involucren y participen más intensamente. El diario de viaje, por tanto, amplía la perspectiva del fotógrafo para el lector.
The blog on the internet describes stories around the photos. The reader thus learns more than is shown in the photo. In this way, travel reports can take readers along more intensively and let them participate. The travel report therefore broadens the photographer's perspective for the reader.
Dia- bzw. Slide-Shows
Presentaciones multimedia
Slide shows

Diashows stellen eine Zusammenfassung vieler guter Fotos dar, die eine tiefgehende Reisebeschreibung ermöglichen. Das Erleben der Fotos auf größerenen Projektionsflächen ist deutlich intensiver, weil die überdimensionale Größe der Fotos den Betrachter fesseln kann. Es bedarf einer Dramaturgie bei der Diashow, die durch Texte, Musik und Überblendtechnik oder auch durch Live-Kommentierung plastisch wird.
Las presentaciones multimedia son un resumen de muchas y buenas fotos, que permiten una descripción en profundidad del viaje. La experiencia de las fotos en pantallas de proyección más grandes es mucho más intensa, ya que el tamaño excesivo de las fotos puede cautivar al espectador. Se requiere una dramaturgia para la presentación multimedia, que se hace vívida a través de textos, música y técnicas de fundido cruzado o también a través de comentarios en vivo.
Slideshows are a summary of many good photos that allow an in-depth description of the journey. The experience of the photos on larger projection screens is much more intense because the oversized format of the photos can captivate the viewer. A dramaturgy is needed in the slide show, which becomes vivid through texts, music and cross-fading techniques or also through live commentary.
Am Schluss steht die Freude über ein gelungenes Projekt.
Al final está la alegría de un proyecto exitoso.
At the end, there is the joy of a successful project.
Kommentar schreiben